Wednesday, November 29, 2006
More fretboard musings
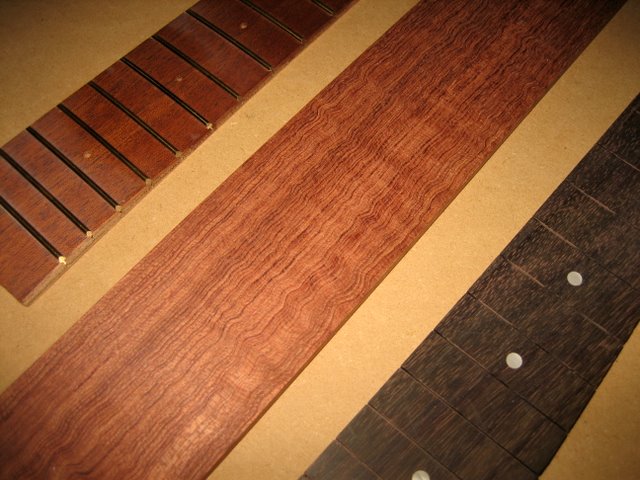
I finally decided to abandon the problematic plywood fretboard that came with the kit. I went on-line and ordered a solid rosewood fretboard blank from Hana Lima 'IA. When I mentioned that I would be using it on a Grizzly kit they kindly offered to sand it a bit thinner than their usual 1/4" to better accommodate the kit. I was very pleased with their customer service and even more pleased when the fretboard arrived! The color is fantastic and it has wonderfully wavy grain. The fretboard on top is the one that came with the kit, and the one on the bottom came with the Stewart MacDonald kit I'll be making after this one.
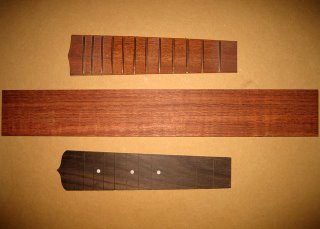

I like the wood so much that now I'm having second thoughts using on this kit! I was curious how well the StewMac fretboard would work on the neck so I put it in place. I was quite surprised to find it also left considerable space on either side. However, this fretboard is perfectly square on the edges which means I could bind it with the leftover binding from the body!


I like the wood so much that now I'm having second thoughts using on this kit! I was curious how well the StewMac fretboard would work on the neck so I put it in place. I was quite surprised to find it also left considerable space on either side. However, this fretboard is perfectly square on the edges which means I could bind it with the leftover binding from the body!

Saturday, November 18, 2006
Shaping the headstock
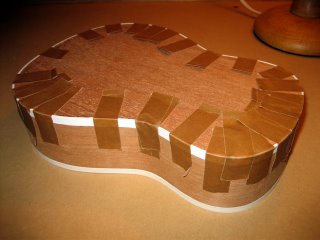
The headstock in the kit is shaped in a simple pointed crown. Not bad but I wanted something different. Over the past few days I've been toying with different shapes for the headstock. I cut out a cardboard template and drew up a whole bunch of different ideas. Ultimately I chose a simple wave pattern and traced it onto the headstock.


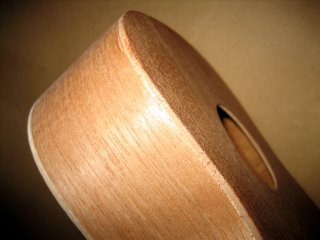
I clamped the neck to my workbench and used my Dremel with a jigsaw attachment to cut it roughly to shape. It was a bit difficult to see what I was doing because the light in my shop (garage) isn't very good but I managed to stay outside of the lines.


I used a file to get through the remaining wood and finished it off with a small sanding drum on the Dremel. I tried to be careful but I still managed to pull off a few chips of wood. I saved the piece of the headstock I cut off so I'll use bits of that to fill the gaps.


Sunday, November 12, 2006
Fretboard musings
As it turns out I didn't have the patience to wait 24 hours for the glue to set on the binding patch so I just went ahead and sanded the body. The binding was a tiny bit high in some places indicating I hadn't routed deep enough all the way around. Sanding took care of that though. And the patched binding looks pretty good too. Most people probably won't even notice it (I hope).


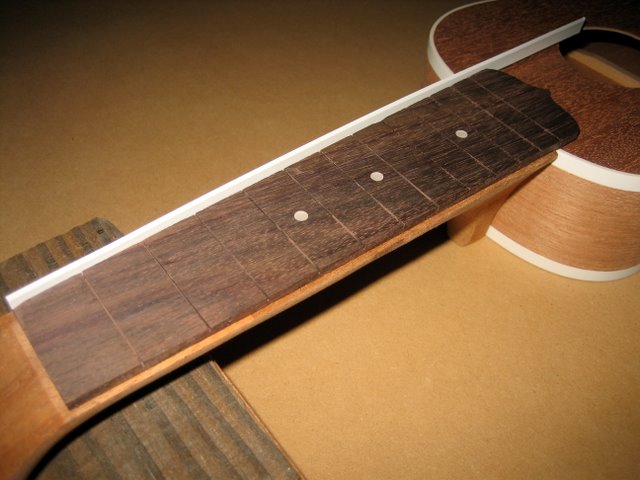
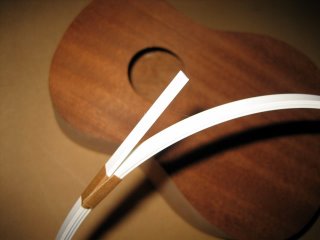
With the body essentially done I turned my attention to the fretboard. Ostensibly there isn't anything to do but since I wasn't ready to start carving the headstock or doing inlay work I just started musing. When I mocked up the neck placement I immediately found that the fretboard had a rather sizable gap on either side. So much that I could stand a piece of scrap binding next to it and still see the gap on the other side.

This got me thinking that I should add binding to the fretboard! I had just enough scrap binding to do both sides if I cut it in half lengthwise. I even had enough to do the end too. I was getting excited about this when I noticed that the frets were filed so aggressively that the fretboard wasn't even square on the edges. Foo. The more I look at this fretboard the less I like it. To help me feel better about it I decided to spruce it up with a nice coat of fretboard oil. Although the edges belie it's doorskin roots, it actually looks pretty good now.


Considering I've essentially only finished the first step of the instructions (sand the body), including a mock-up shot at this stage is a bit premature. But that never stopped me before.

Patching the binding
I took my time and carefully removed the tape holding the binding and was pleased to see it came out even better than the binding on the top. Maybe I should have done the back first. There was still the issue of the gaps around the patch in the binding however. I filed some scrap binding and mixed it with Weld-On Cement to form a paste. I spread the paste over the gaps and left it to dry.


I was hoping to get more than this done today but the next step is sanding, so it looks like I'll just have to wait. There isn't much left to do for the body. After this I'll sand it down and then work on the neck until it's time to join them.


I was hoping to get more than this done today but the next step is sanding, so it looks like I'll just have to wait. There isn't much left to do for the body. After this I'll sand it down and then work on the neck until it's time to join them.
Saturday, November 11, 2006
Binding the back
The binding on the top not only looks good but it made the body much stronger since the kerfing inside wasn't fully supporting the top. Besides wanting more binding practice that was good motivation to bind the back as well. Once again I routed the back in sections to avoid tearing out the wood. However, just like the top there were a couple of gaps because of the poorly installed kerfing.


I bend the binding just as I'd done for the top and glued it on a little bit at a time since the Weld-On Cement sets rather quickly. It's not as fast as super glue, but I didn't want to take any chances.

I cut the binding to size before I glued it on and once again I cut it too short! Foo. This is a skill I'll have to work on. Since this part of the binding will be visible on the back of the guitar I patched it up using a small piece of scrap binding. I'll have to clean up the gaps once the glue is dry.


That done I let the binding dry overnight. I fold over the end of the tape to make it easier to remove.


I bend the binding just as I'd done for the top and glued it on a little bit at a time since the Weld-On Cement sets rather quickly. It's not as fast as super glue, but I didn't want to take any chances.
I cut the binding to size before I glued it on and once again I cut it too short! Foo. This is a skill I'll have to work on. Since this part of the binding will be visible on the back of the guitar I patched it up using a small piece of scrap binding. I'll have to clean up the gaps once the glue is dry.


That done I let the binding dry overnight. I fold over the end of the tape to make it easier to remove.

Sunday, November 05, 2006
Binding the top
Since the top was now a bit unstable I decided to install the binding now instead of routing the back and installing all of the binding at once. Before I went any further I decided to wipe down the body with naptha to clean off the wood. I figured once the binding was on the naptha might tend to dissolve either the plastic or the glue. I was rather surprised to see a good deal of color come off! Clearly this isn't raw wood.

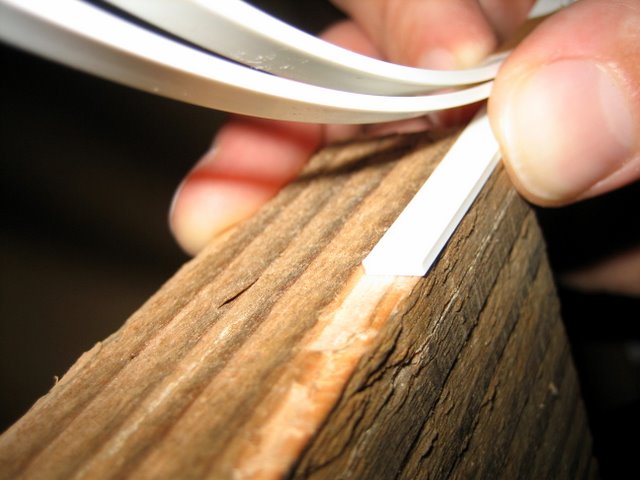
Plastic binding can be bent using a hair dryer -- if you have one. It turned out I didn't so I went out and got the cheapest one I could find ($13) and clamped it to my workbench. I moved the binding in front of it and held it in shape when it was soft. And it's not a coincidence that there is a fire extinguisher nearby -- plastic binding is very flamable.

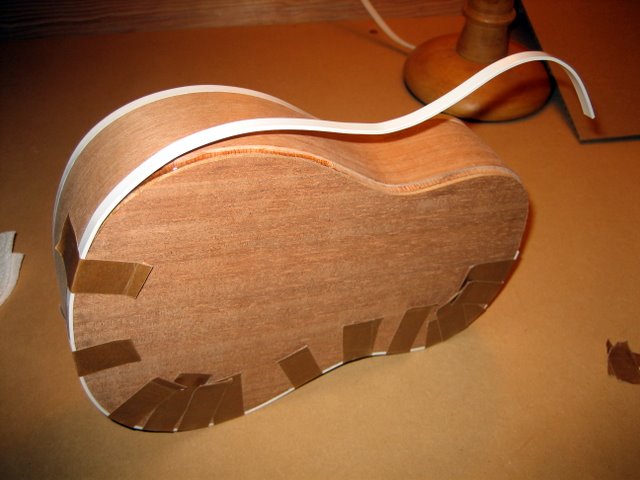
Using the body as a guide I eventually bent it enough to be held in place with little effort. The tape on the binding and the tail of the body is a reference mark I used to align the binding to make fitting it easier.

Once again consulting Stewart MacDonald I used Weld-On Cement to glue on the binding and held it in place with special binding tape. Regular masking tape may have worked, but I figured I'd be using this on several projects so I might as well get the good stuff. I used a relatively thin layer of glue to avoid sqeezing it out onto the body and possibly affecting the finish.

After a couple of days of drying I very carefully removed the tape and was quite pleased with my first attempt at binding! I did manage to cut the binding a bit short (see the gap near the neck joint) but that'll be covered up by the fretboard so I'm not going to fix it. It appears that I used enough glue because it feels nice and solid.


Plastic binding can be bent using a hair dryer -- if you have one. It turned out I didn't so I went out and got the cheapest one I could find ($13) and clamped it to my workbench. I moved the binding in front of it and held it in shape when it was soft. And it's not a coincidence that there is a fire extinguisher nearby -- plastic binding is very flamable.

Using the body as a guide I eventually bent it enough to be held in place with little effort. The tape on the binding and the tail of the body is a reference mark I used to align the binding to make fitting it easier.

Once again consulting Stewart MacDonald I used Weld-On Cement to glue on the binding and held it in place with special binding tape. Regular masking tape may have worked, but I figured I'd be using this on several projects so I might as well get the good stuff. I used a relatively thin layer of glue to avoid sqeezing it out onto the body and possibly affecting the finish.

After a couple of days of drying I very carefully removed the tape and was quite pleased with my first attempt at binding! I did manage to cut the binding a bit short (see the gap near the neck joint) but that'll be covered up by the fretboard so I'm not going to fix it. It appears that I used enough glue because it feels nice and solid.

Routing the top
I'm a bit nervous about binding since it requires routing a very precise channel around the body and bending the binding to fit -- things that could easily go wrong very quickly. But then again, that's why I'm trying this on an inexpensive kit! The wood of the body looks good but the edges of the plywood top and back spoil an otherwise nice look. Yet another reason to add some binding.
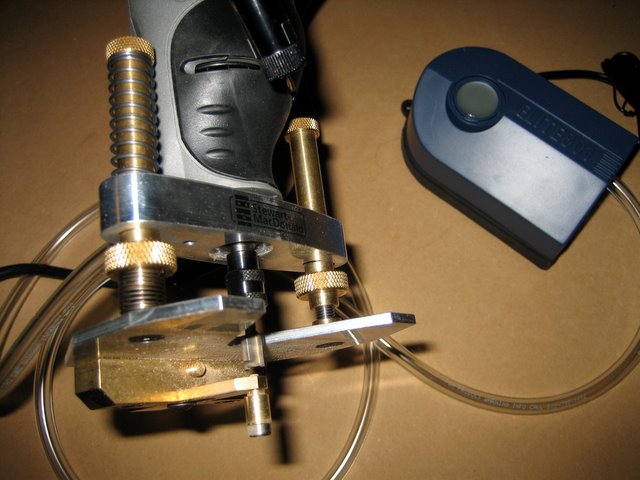
I'd done some homework and decided my best option for routing the top would be a Dremel rotary tool and a router base from Stewart MacDonald. It can be adjusted very precicely and comes with an air pump to keep sawdust from building up while you're working.

I also picked up some white plastic binding. Plastic binding is easier to work with than wood since it's a bit more forgiving and can be bent using a hair dryer insteady of a bending iron. I started out testing the router on a piece of scrap wood and adjusted it until the binding fit perfectly.

With my confidence building I clamped down the body and got to it. I kept the Dremel at around 4K rpm and made the cut in three passes. I was very pleased how easy it was and how precise the channel was.


I carefully made my way around the body using the routing pattern suggested at Stewart MacDonald in their excellent tutorial. I was rather concerned to see a rather large gap between the top and the side in a couple of spots.

Closer inspection revealed that the kerfing inside the body is not flush with the top edge of the sides. Fortunately it wasn't like that all the way around so the top stayed attached!

I'd done some homework and decided my best option for routing the top would be a Dremel rotary tool and a router base from Stewart MacDonald. It can be adjusted very precicely and comes with an air pump to keep sawdust from building up while you're working.
I also picked up some white plastic binding. Plastic binding is easier to work with than wood since it's a bit more forgiving and can be bent using a hair dryer insteady of a bending iron. I started out testing the router on a piece of scrap wood and adjusted it until the binding fit perfectly.

With my confidence building I clamped down the body and got to it. I kept the Dremel at around 4K rpm and made the cut in three passes. I was very pleased how easy it was and how precise the channel was.


I carefully made my way around the body using the routing pattern suggested at Stewart MacDonald in their excellent tutorial. I was rather concerned to see a rather large gap between the top and the side in a couple of spots.

Closer inspection revealed that the kerfing inside the body is not flush with the top edge of the sides. Fortunately it wasn't like that all the way around so the top stayed attached!
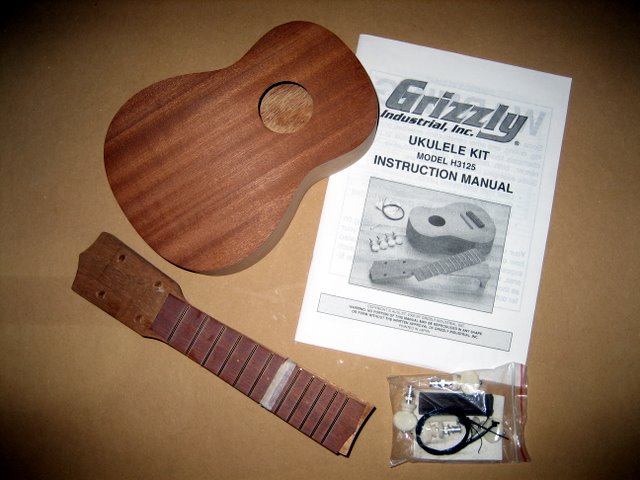
Soprano ukulele kit
I got a nice mahogany acoustic guitar kit from Stewart MacDonald awhile ago but I haven't started it because I didn't want to try out my fledgeling luthier skills on such a nice kit. So I looked around for and found this Grizzly soprano ukulele kit for $25!
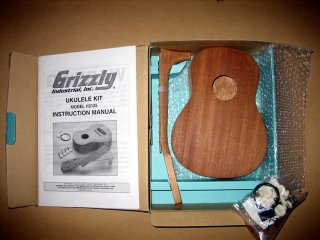

The body is made of mahogany plywood and has some nice grain on top. The neck feels nice and solid but the fretboard is pretty cheap. The instructions look minimal but there are a few sites describing building these kits out there (and now there is one more!). This site describes modifications made to the exact same kit. I'm not quite that ambitious, but it certainly is inspirational.

The body is made of mahogany plywood and has some nice grain on top. The neck feels nice and solid but the fretboard is pretty cheap. The instructions look minimal but there are a few sites describing building these kits out there (and now there is one more!). This site describes modifications made to the exact same kit. I'm not quite that ambitious, but it certainly is inspirational.
![]()