Sunday, November 05, 2006
Routing the top
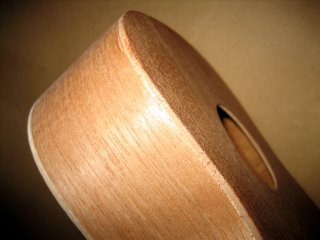
I'm a bit nervous about binding since it requires routing a very precise channel around the body and bending the binding to fit -- things that could easily go wrong very quickly. But then again, that's why I'm trying this on an inexpensive kit! The wood of the body looks good but the edges of the plywood top and back spoil an otherwise nice look. Yet another reason to add some binding.

I'd done some homework and decided my best option for routing the top would be a Dremel rotary tool and a router base from Stewart MacDonald. It can be adjusted very precicely and comes with an air pump to keep sawdust from building up while you're working.

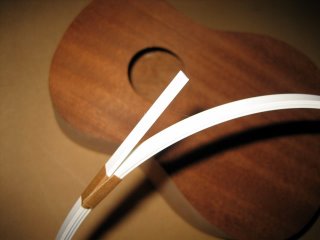
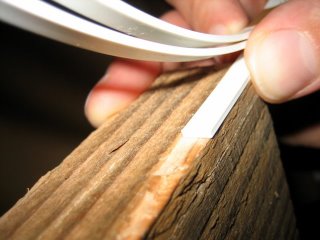
I also picked up some white plastic binding. Plastic binding is easier to work with than wood since it's a bit more forgiving and can be bent using a hair dryer insteady of a bending iron. I started out testing the router on a piece of scrap wood and adjusted it until the binding fit perfectly.


With my confidence building I clamped down the body and got to it. I kept the Dremel at around 4K rpm and made the cut in three passes. I was very pleased how easy it was and how precise the channel was.


I carefully made my way around the body using the routing pattern suggested at Stewart MacDonald in their excellent tutorial. I was rather concerned to see a rather large gap between the top and the side in a couple of spots.

Closer inspection revealed that the kerfing inside the body is not flush with the top edge of the sides. Fortunately it wasn't like that all the way around so the top stayed attached!

I'd done some homework and decided my best option for routing the top would be a Dremel rotary tool and a router base from Stewart MacDonald. It can be adjusted very precicely and comes with an air pump to keep sawdust from building up while you're working.

I also picked up some white plastic binding. Plastic binding is easier to work with than wood since it's a bit more forgiving and can be bent using a hair dryer insteady of a bending iron. I started out testing the router on a piece of scrap wood and adjusted it until the binding fit perfectly.


With my confidence building I clamped down the body and got to it. I kept the Dremel at around 4K rpm and made the cut in three passes. I was very pleased how easy it was and how precise the channel was.


I carefully made my way around the body using the routing pattern suggested at Stewart MacDonald in their excellent tutorial. I was rather concerned to see a rather large gap between the top and the side in a couple of spots.

Closer inspection revealed that the kerfing inside the body is not flush with the top edge of the sides. Fortunately it wasn't like that all the way around so the top stayed attached!